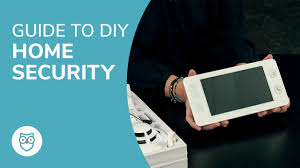
Securing your home used to require expensive professional installations, multi-year contracts, and technicians drilling holes through your walls. Today, the landscape has completely shifted. Modern wireless technology allows anyone to set up a robust, enterprise-grade security system in an afternoon.
Whether you are looking to protect a studio apartment or a sprawling multi-story house, this guide covers everything you need to know to plan, install, configure, and maintain a comprehensive DIY home security system.
Phase 1: Planning Your Security Footprint
Before unboxing any hardware, the single most critical step is to think like an intruder. Take a notepad and walk the perimeter of your property—both inside and out—to identify your home’s unique vulnerabilities.
Assessing Vulnerability Points
-
Primary Entryways: The front door and back door account for the majority of residential break-ins.
-
Ground-Floor Windows: Easily accessible windows, hidden by overgrown landscaping, are prime targets.
-
The Garage: Often overlooked, the door leading from an attached garage into the main house is a notoriously weak link.
-
Blind Spots: Side pathways, dark alcoves, or areas completely obscured from street view.
Designing Your Hardware Ecosystem
A truly comprehensive DIY security system balances multiple layers of defense. Depending on your needs, your kit will likely consist of a mix of these fundamental components:
| Component | Primary Function | Ideal Placement |
| Central Hub / Control Panel | The “brain” of the system; communicates with all devices. | Centrally located near a main entrance, yet away from direct view from windows. |
| Contact (Entry) Sensors | Detects when a door or window is opened. | Every exterior door and all ground-floor windows. |
| Motion Sensors | Detects movement within a specific interior radius. | High-traffic hallways, main living spaces, positioned 6 to 7 feet high. |
| Glass-Break Sensors | Listens for the specific acoustic frequency of shattering glass. | Near large glass sliding doors or clusters of windows. |
| Security Cameras | Provides live feeds and recorded video verification. | Front porch, backyard, driveways, and main indoor thoroughfares. |
| Environmental Sensors | Monitors for smoke, fire, carbon monoxide, or water leaks. | Near water heaters, basements, kitchens, and sleeping areas. |
Phase 2: Unboxing and Pre-Installation Setup
Once you choose a DIY brand (popular ecosystem ecosystems include SimpliSafe, Abode, ADT Blu, Ring, or Eufy), resist the urge to immediately start sticking sensors to walls. A systematic pre-setup saves hours of troubleshooting later.
Step 1: Inventory Check and Pre-Staging
Clear off a large table or kitchen counter. Unbox every component and lay them out in neat, orderly groups. Keep the instruction manuals, charging cables, and mounting hardware paired with their respective devices.
Step 2: Power and Account Initialization
-
Plug in the Central Hub: Connect your main control panel or hub to a reliable power outlet. Ensure it is within strong range of your home’s Wi-Fi router.
-
Download the Companion App: Install the brand’s security app on your smartphone or tablet.
-
Account Creation: Create a highly secure account. Enable Two-Factor Authentication (2FA) and strong encryption immediately. Your security system is only as secure as the digital gateway protecting it.
-
Connect the Hub to the App: Follow the on-screen prompts to pair your central hub with your app via Bluetooth or your local Wi-Fi network.
Pro Tip: Keep a tablet handy during this process. The larger screen makes it significantly easier to manage maps, name rooms, and monitor live video feeds while moving through your home.
Phase 3: Step-by-Step Hardware Installation
With your hub initialized, it’s time to deploy your hardware. Most modern DIY systems rely on semi-permanent adhesive strips (like 3M or Command tape), meaning you won’t need a heavy toolbelt. However, having a ladder, a screwdriver set, and a manual drill close by is recommended.
1. Mounting Contact (Door/Window) Sensors
Contact sensors consist of two separate pieces: the larger transmitter/sensor and a smaller magnet. Together, they form an invisible magnetic circuit.
-
Surface Preparation: Wipe down the door frame and the door itself with rubbing alcohol to remove grease and dust. This ensures the adhesive strips bond completely.
-
Mind the Gap: Place the sensor on the frame and the magnet on the moving door (or vice versa). When the door is closed, the gap between the two pieces must be tiny—usually under 0.75 inches (approx. 2 cm). If they are placed too far apart, the system will read the door as permanently open.
-
Alignment: Ensure the alignment markers (often subtle notches or lines stamped onto the plastic bodies) match up precisely.
2. Positioning Motion Sensors Effectively
Motion sensors use passive infrared (PIR) technology to detect body heat shifts. Poor placement is the number one cause of frustrating false alarms.
-
The Golden Zone: Mount motion detectors in the corners of main rooms or long corridors. This maximizes their wide-angle field of view.
-
The Right Height: Position them 6 to 7 feet off the ground. Placed too high, they can overshoot an intruder; placed too low, they will catch household pets.
-
Avoid Heat Sources: Never point a motion sensor directly at a window, fireplace, radiator, or HVAC vent. Rapid temperature fluctuations from shifting sunlight or heating systems can mimic human movement.
3. Setting Up Security Cameras
Cameras require a bit more strategic positioning and occasionally some basic drilling, especially for exterior setups.
-
Check Signal Strength First: Before permanently screwing an outdoor camera into your siding, hold the camera in that exact spot and look at your smartphone app. Verify that the Wi-Fi signal is strong. A weak signal means laggy live feeds and dropped recordings.
-
Optimal Angles: Mount cameras out of easy reach (at least 8 to 9 feet up) to prevent tampering. Angle the lens downward to capture faces clearly rather than the tops of hats.
-
Manage Backlighting: Avoid angling cameras directly toward the sun or bright streetlights, which can cause severe glare and turn potential intruders into unrecognizable silhouettes.
Phase 4: System Integration and Smart Naming
As you install each device, your app will prompt you to add it to your virtual ecosystem. This is where attention to detail pays off during an emergency.
Use Clear, Descriptive Naming Conventions
Avoid generic tags like “Sensor 1” or “Motion 3.” If an alarm triggers at 3:00 AM, you need to know exactly where the breach occurred. Use specific, intuitive names:
-
Front Entry Door -
Kitchen Left Window -
Basement Hallway Motion -
Master Bedroom Glass Break
Establishing Automation and Modes
Most modern systems operate using three distinct profiles:
-
Away Mode: All sensors—including entry, motion, and interior cameras—are fully active. Use this when the house is completely empty.
-
Home / Night Mode: Entry sensors and perimeter glass-break detectors are active, but interior motion sensors are bypassed. This allows you to walk down the hall to the kitchen at night without triggering a full siren response.
-
Disarmed Mode: All security sensors are turned off, though environmental monitors (smoke and leak detectors) remain active 24/7.
Phase 5: Testing and Optimization
Never assume your system works perfectly right out of the box. A comprehensive installation requires rigorous testing.
Executing a Complete “Walk Test”
Most DIY security apps feature a dedicated Test Mode or “Walk Test” setting. When activated, triggering a sensor will cause the hub to beep or flash rather than sounding the main ear-piercing siren or calling emergency services.
-
Test the Doors/Windows: Open every protected entryway. Ensure the hub responds instantly and your app registers the correct location.
-
Test the Motion Range: Walk across the room in front of your motion detectors at various speeds to ensure the detection radius fully covers the targeted space.
-
Test Camera Triggers: Move into the frame of your cameras. Check the app to see if the motion-activated recording triggers properly and saves a clean, sharp clip.
Configuring Entry and Exit Delays
Give yourself a buffer to prevent accidental self-triggers.
-
Exit Delay: Set a 45 to 60-second grace period. This gives you plenty of time to arm the system, grab your bags, and step outside the front door before the system locks down.
-
Entry Delay: Set a 30 to 45-second buffer for entering your home. This allows you to walk through the door and disarm the system via the keypad or your phone app before the alarms blare.
Phase 6: Long-Term System Maintenance
A DIY home security system is not a set-it-and-forget-it installation. To maintain peak performance, implement a straightforward maintenance checklist.
-
Monthly Battery Audits: Wireless sensors run on batteries that typically last between 1 to 3 years. Check your app monthly for low-battery alerts, and keep a stash of common lithium coin-cell batteries (CR2032 or CR123A) on hand.
-
Lens Cleaning: Exterior security cameras gather dust, pollen, spiderwebs, and water spots over time. Wipe down the lenses every few months with a clean microfiber cloth to ensure crystal-clear video fidelity.
-
Firmware Updates: Manufacturers regularly push over-the-air firmware updates to patch security vulnerabilities and improve device connectivity. Keep your mobile app updated and allow your system to install device patches automatically.
-
Final Touch: Place your brand’s security yard signs and window stickers prominently near your main entryways. Visual deterrence is highly effective; most opportunistic burglars will bypass a home entirely if they see it is actively monitored.
